Geometry Unit – Circumference and Area of a Circle

Last week we spent some time working with circles. All of those snow days helped me out because it fell perfectly in line with Pi Day this year! We began by investigating the relationship between circumference and diameter. I used materials made by Illuminations. They can be found here.
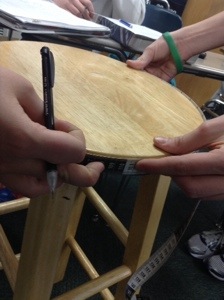
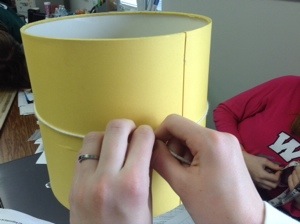
We talked about the importance of measuring with precision. We also talked about making sure you get as close to the diameter as possible. I split the students in groups and let them walk around the room to find circular objects to measure. I had many objects set out but I also let them look for others.
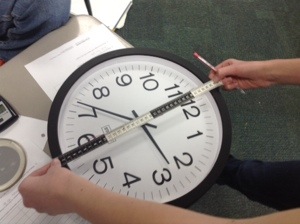
20140318-170328.jpg
20140318-170250.jpg
20140318-170229.jpg

After the groups completed their tables, they averaged the ratios they calculated. As a class we also averaged the group results and came up with 3.24.
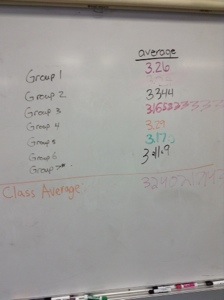
20140318-175859.jpg
I asked the groups to discuss what they noticed about all of the ratios. They all noticed the ratios were around 3-3.5. Most groups quickly realized that the ratio was pi. Each group was instructed to then write an equation relating circumference, diameter and pi. Discussing all the variations of the equation was really helpful. It allowed students to see that we could use it to solve for the diameter or the circumference.

After we found the formula for the circumference of a circle, we went on to the area of a circle. Throughout this unit we have been cutting shapes to rearrange them into different shapes that we know the area formulas for. You can see more on that in my previous post.

We started with a circle that was divided in to 12 equal sections. We cut the 12th section in to two parts and labeled them a and b.
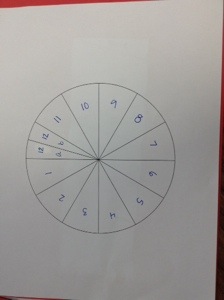
20140318-170114.jpg

We cut out the segments and rearranged them so they formed a shape that looked somewhat like a rectangle. The students were very quick to point out that the shape was not a rectangle. We discussed what would happen if we continued to cut the segments smaller and smaller. What would the shape look like then. We concluded that it would become closer to a rectangle as we continued to cut so it was ok to use the rectangle area formula.
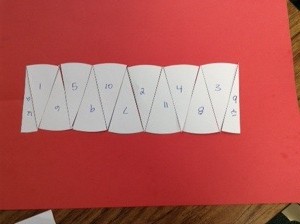
20140318-170101.jpg
Students decided that the height of the rectangle would be the radius. The base of the rectangle took a little more thought, but I was really impressed that they were able to see on their own that it was half the circumference or 1/2(2πr). We simplified so the base of the rectangle equals π×r, making the area of the rectangle equal to π×r×r or πr². The students thought that was really awesome, as did I! Very rarely is the derivation of the area of a circle taught.  This is my first time teaching it, I’m embarrassed to say. But it went really well, and I will definitely use it from now on! All credit goes to my teacher assistant, Dominic Taylor, for finding it! Check out his blog at dataylor92.wordpress.com!

Geometry Unit – Area Formulas for Polygons

I find that by 7th grade, students can generally rattle off a few area formulas like base x height and half base x height and so on. Often times times they mix up which polygon the formula goes with. And rarely do I think students know where the formula came from. I always prefer my students know HOW to find a formula over actually knowing the formula itself. If we’re lucky, teaching where the formula comes from might accomplish both!

Warm up

Students cut out 1 rectangle, 1 triangle, 1 parallelogram, and 2 congruent trapezoids from graph paper. I ask them to make the bases and heights whole numbers. Also, you may want to cover how to make sure their parallelogram has parallel slant sides.

Deriving the Formulas

I spent some time with my 7th graders talking about how to find the area of a polygon. We started with the basics, a rectangle. But instead of asking for the formula, I asked them how they would tell a 1st grader who couldn’t multiply to find the area of the rectangle they had cut out. After hearing all the responses, then I asked the students how they, a 7th grader, would find the area. They were all very sure the area equals base times height, A=b x h. Once we had that down, we could work on the other polygons.

20140225-204906.jpg

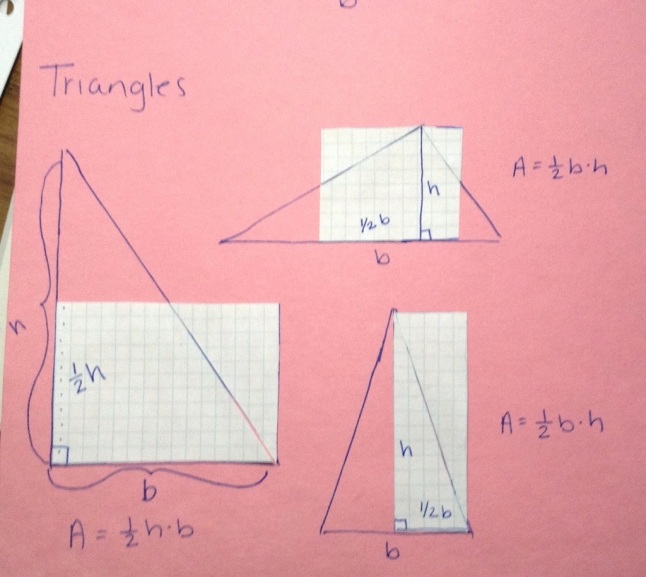
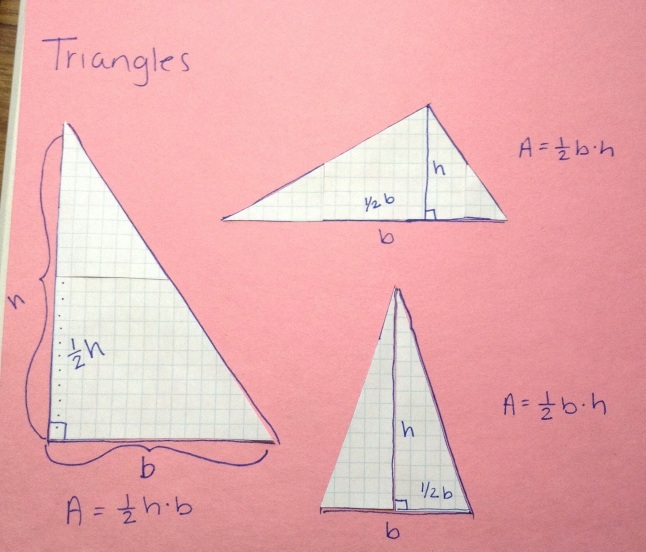
Our goal was to turn the remaining polygons into a shape that we already had an area formula for, like a rectangle. We next looked at our triangles. Students should label the base and height on their shape.

20140225-204920.jpg

Students can cut the triangles, but the area doesn’t change. So once the triangles are cut, they can be reconfigured to be a rectangle with half the height and the same base as the original, or vice versa. Some triangles are much easier to make into a rectangles, like a right or isosceles triangle, but you can still make it work with any triangle as can be seen in the pictures below. Once the rectangles were formed, we wrote out the area formula for each triangle and found it would always be 1/2 b x h.

20140225-204935.jpg

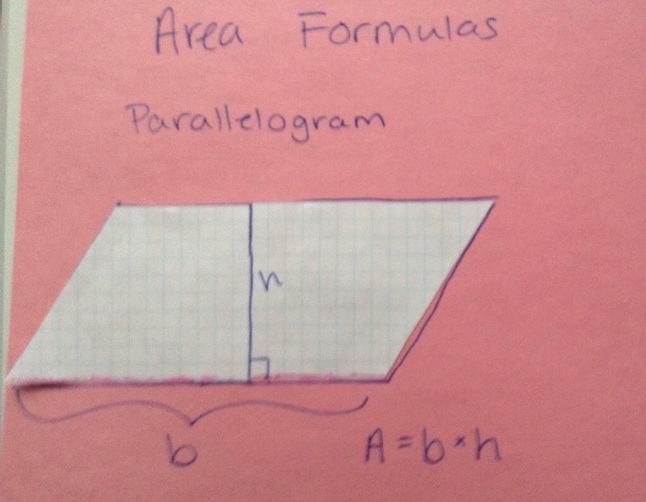
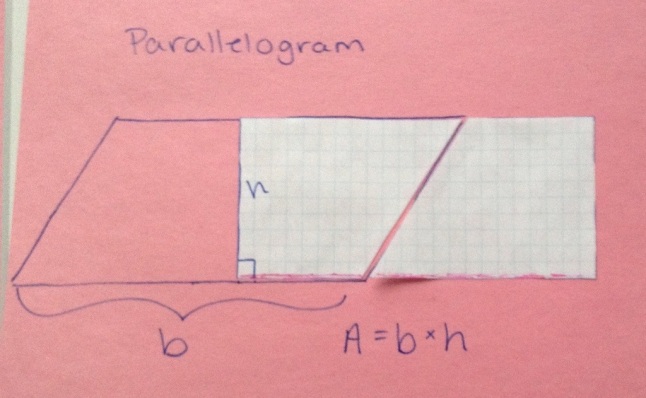
Next we moved on to parallelogram which is pretty straightforward. I asked the students to cut along the height and then to try to rearrange the shapes into a rectangle. They got it pretty quickly. They also recognized that the dimensions of the new rectangle were the same as those of the parallelogram so again the area was equal to b x h.

20140225-204954.jpg

20140225-205005.jpg

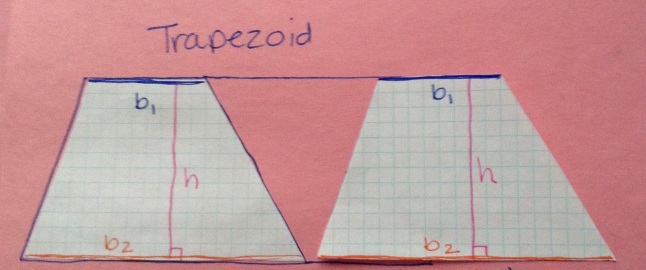
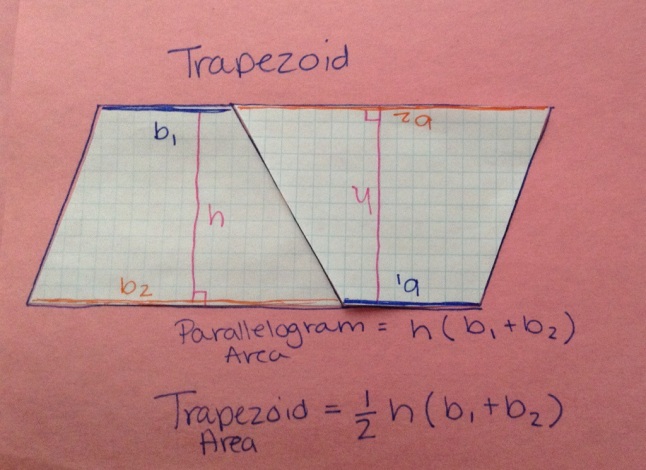
Last but not least, we got to the trapezoid, the trickiest of the all! You can cut a trapezoid into pieces that will form a rectangle but it is definitely harder to walk the students through. So instead we used the formula for the area of a parallelogram. I asked students to arrange their two congruent trapezoids into a shape we knew the area for.

20140225-205025.jpg

I didn’t tell them to make a parallelogram but they figured it out. We wrote out the area for the parallelogram we made. From there, it was easy to see the area of the trapezoid was half of that, thus…

20140225-205035.jpg

And ta-da! We’ve found the formulas for the area of a rectangle, triangle, parallelogram, and trapezoid!